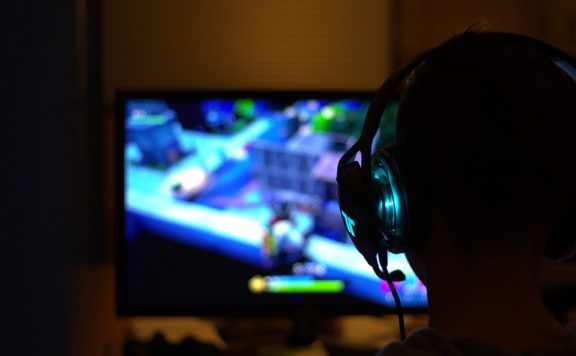
If you are a gaming enthusiast, the chances are that you have heard of other gamers building their gaming rig. The chances are that you have promised yourself to come up with your own, but you don’t know where to begin. One thing to note is that building your first gaming pc is a satisfying experience, which means that you get to build your personal needs. The process itself doesn’t have to be complicated. With the step-by-step guide given below, you will no longer have to worry about messing with clock timings, north bridges, and jumper switches.
1. Preparation
The first and most overlooked step is preparation. It’s in this step that you check to ensure all the important parts are working before you begin the assembly. The preparation phase helps save you the agony that comes with realizing that a specific part isn’t working when everything is done.
2. Mount PSU and Cooler
Once you have confirmed that everything is functional, it’s time to get down to business. Here you begin by installing the PSU and cooler radiator. The reason why you would want to start with the two is that they are the bulkiest of all the parts. Besides, the two parts need to be installed before anything else gets in the way. For the PSU, it would be best if you chose a modular one as it becomes easy to add it to the main unit in the base without hassle. When it comes to installing the cooler radiator, check the fan to see which direction they will push the air. It’s supposed to blow the air up from the inside of the case, over the radiator, and towards the top vent.
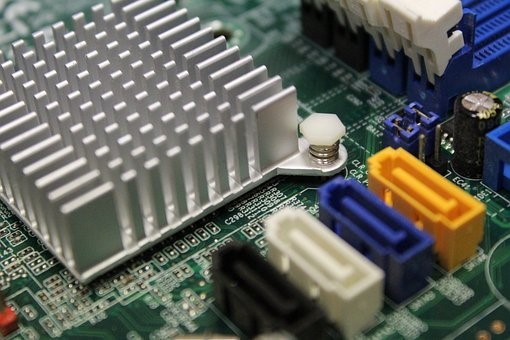
3. Insert The Core Part Of The Gaming Rig
With the power unit and the cooler radiator intact, it’s time to deal with the heart of your gaming PC. These parts include; the motherboard, processor, and memory. Start by dropping the CPU and RAM. By starting with the two, you save yourself from fiddling around because you can’t see. When it comes to adding the motherboard, ensure that the little stands that the motherboard screws into are in place before adding it on the mounting tray.
4. Add Some Storage
After all, your pc gaming experience will be impossible without some storage. This is, therefore, an important step as well. When it comes to storage, most people prefer using SSDs as opposed to the hard drives from an old pc. One good thing about most cases is that they have tool-less drive bays. Therefore, you can easily add a 3.5-inch drive in seconds. But, when it comes to the 2.5 inch SSD, you may need your screwdriver to check and ensure that the power and data connections are facing the back of the case.

5. Plug Everything
The first four steps of building your first-ever gaming pc are easy and straightforward. This step is where things get a bit messy. No one enjoys cabling. Unfortunately, it’s one of the crucial steps towards achieving your dream gaming pc. This step is where you connect and wire everything properly. Failure to do so, you may end up with only a blank screen. Now that you are using a modular power unit proceed and plug all the necessary power cables into it. The parts to be attached include; SATA, Molex, CPU, and the motherboard. Once you are done with attaching all the crucial parts to your power supply, continue to attach the relevant parts to the motherboard and storage devices.
6. Install The Graphics Card
There is nothing that feels amazing than playing a game on a pc that has a graphics card already installed. It remains one of the crucial parts which make the gaming experience great. Therefore, this sixth step remains vital, and one that must be handled effectively. You should carefully place the card in the PCIe slot. Ensure that the slot used is the closest to the CPU. Once the card is in place, go ahead and attach the relevant power cables directly from the power unit. If you are using the modern graphics card, you may realize that they need extra power connections. Therefore, if that’s the case, you must ensure that all the sockets on the card are filled.
7. Attach The Monitor
With the graphics in place, you are almost done with building your first gaming rig. One thing to remember is that your gaming rig needs a monitor to display. Therefore, your next step should be to add a monitor to the whole setup. If you are looking forward to having a great gaming experience, you should consider using two or more monitors. When it comes to using more than two monitors, you must know that there are other costs involved. For instance, you need a gaming desk to host the monitors. Luckily, you can find reviews on the best desks you can consider if you plan to use additional monitors. With the reviews, you can easily settle for a desk that not only meets your budget but also meets your gaming expectations.
8. Boot The System
With the monitor plugged, it means that you can now boot your system. Plug the rig into the power source, as well as the monitor. Then, continue to turn on your system. If the display starts to show, it means that you have successfully built your first gaming rig. Your next move should be to boot the pc to set up everything ready for your gaming experience. However, there are times when the screen may not show anything. In case that happens, you should first check if the monitor itself is well connected before counterchecking the cabling in your rig. With the confirmation, your first gaming rig should be up and running.
Building a gaming rig is a dream that comes true for many gamers. Sadly, not all the players can achieve that. Explained in this article is a step-by-step guide that you can utilize to help you get done with building your first gaming rig. The guide is straightforward and easy to understand for even the first-timers. By following the guide, you will be surprised at how quickly you will build the rig without any hassle.